Setting up your Amplex email via Outlook in Office 365 is simple. Following these steps below will allow you to add this on your Windows laptop or desktop. Click refers to using the left mouse button and Tap refers to pressing with your finger on a touchscreen enabled screen.
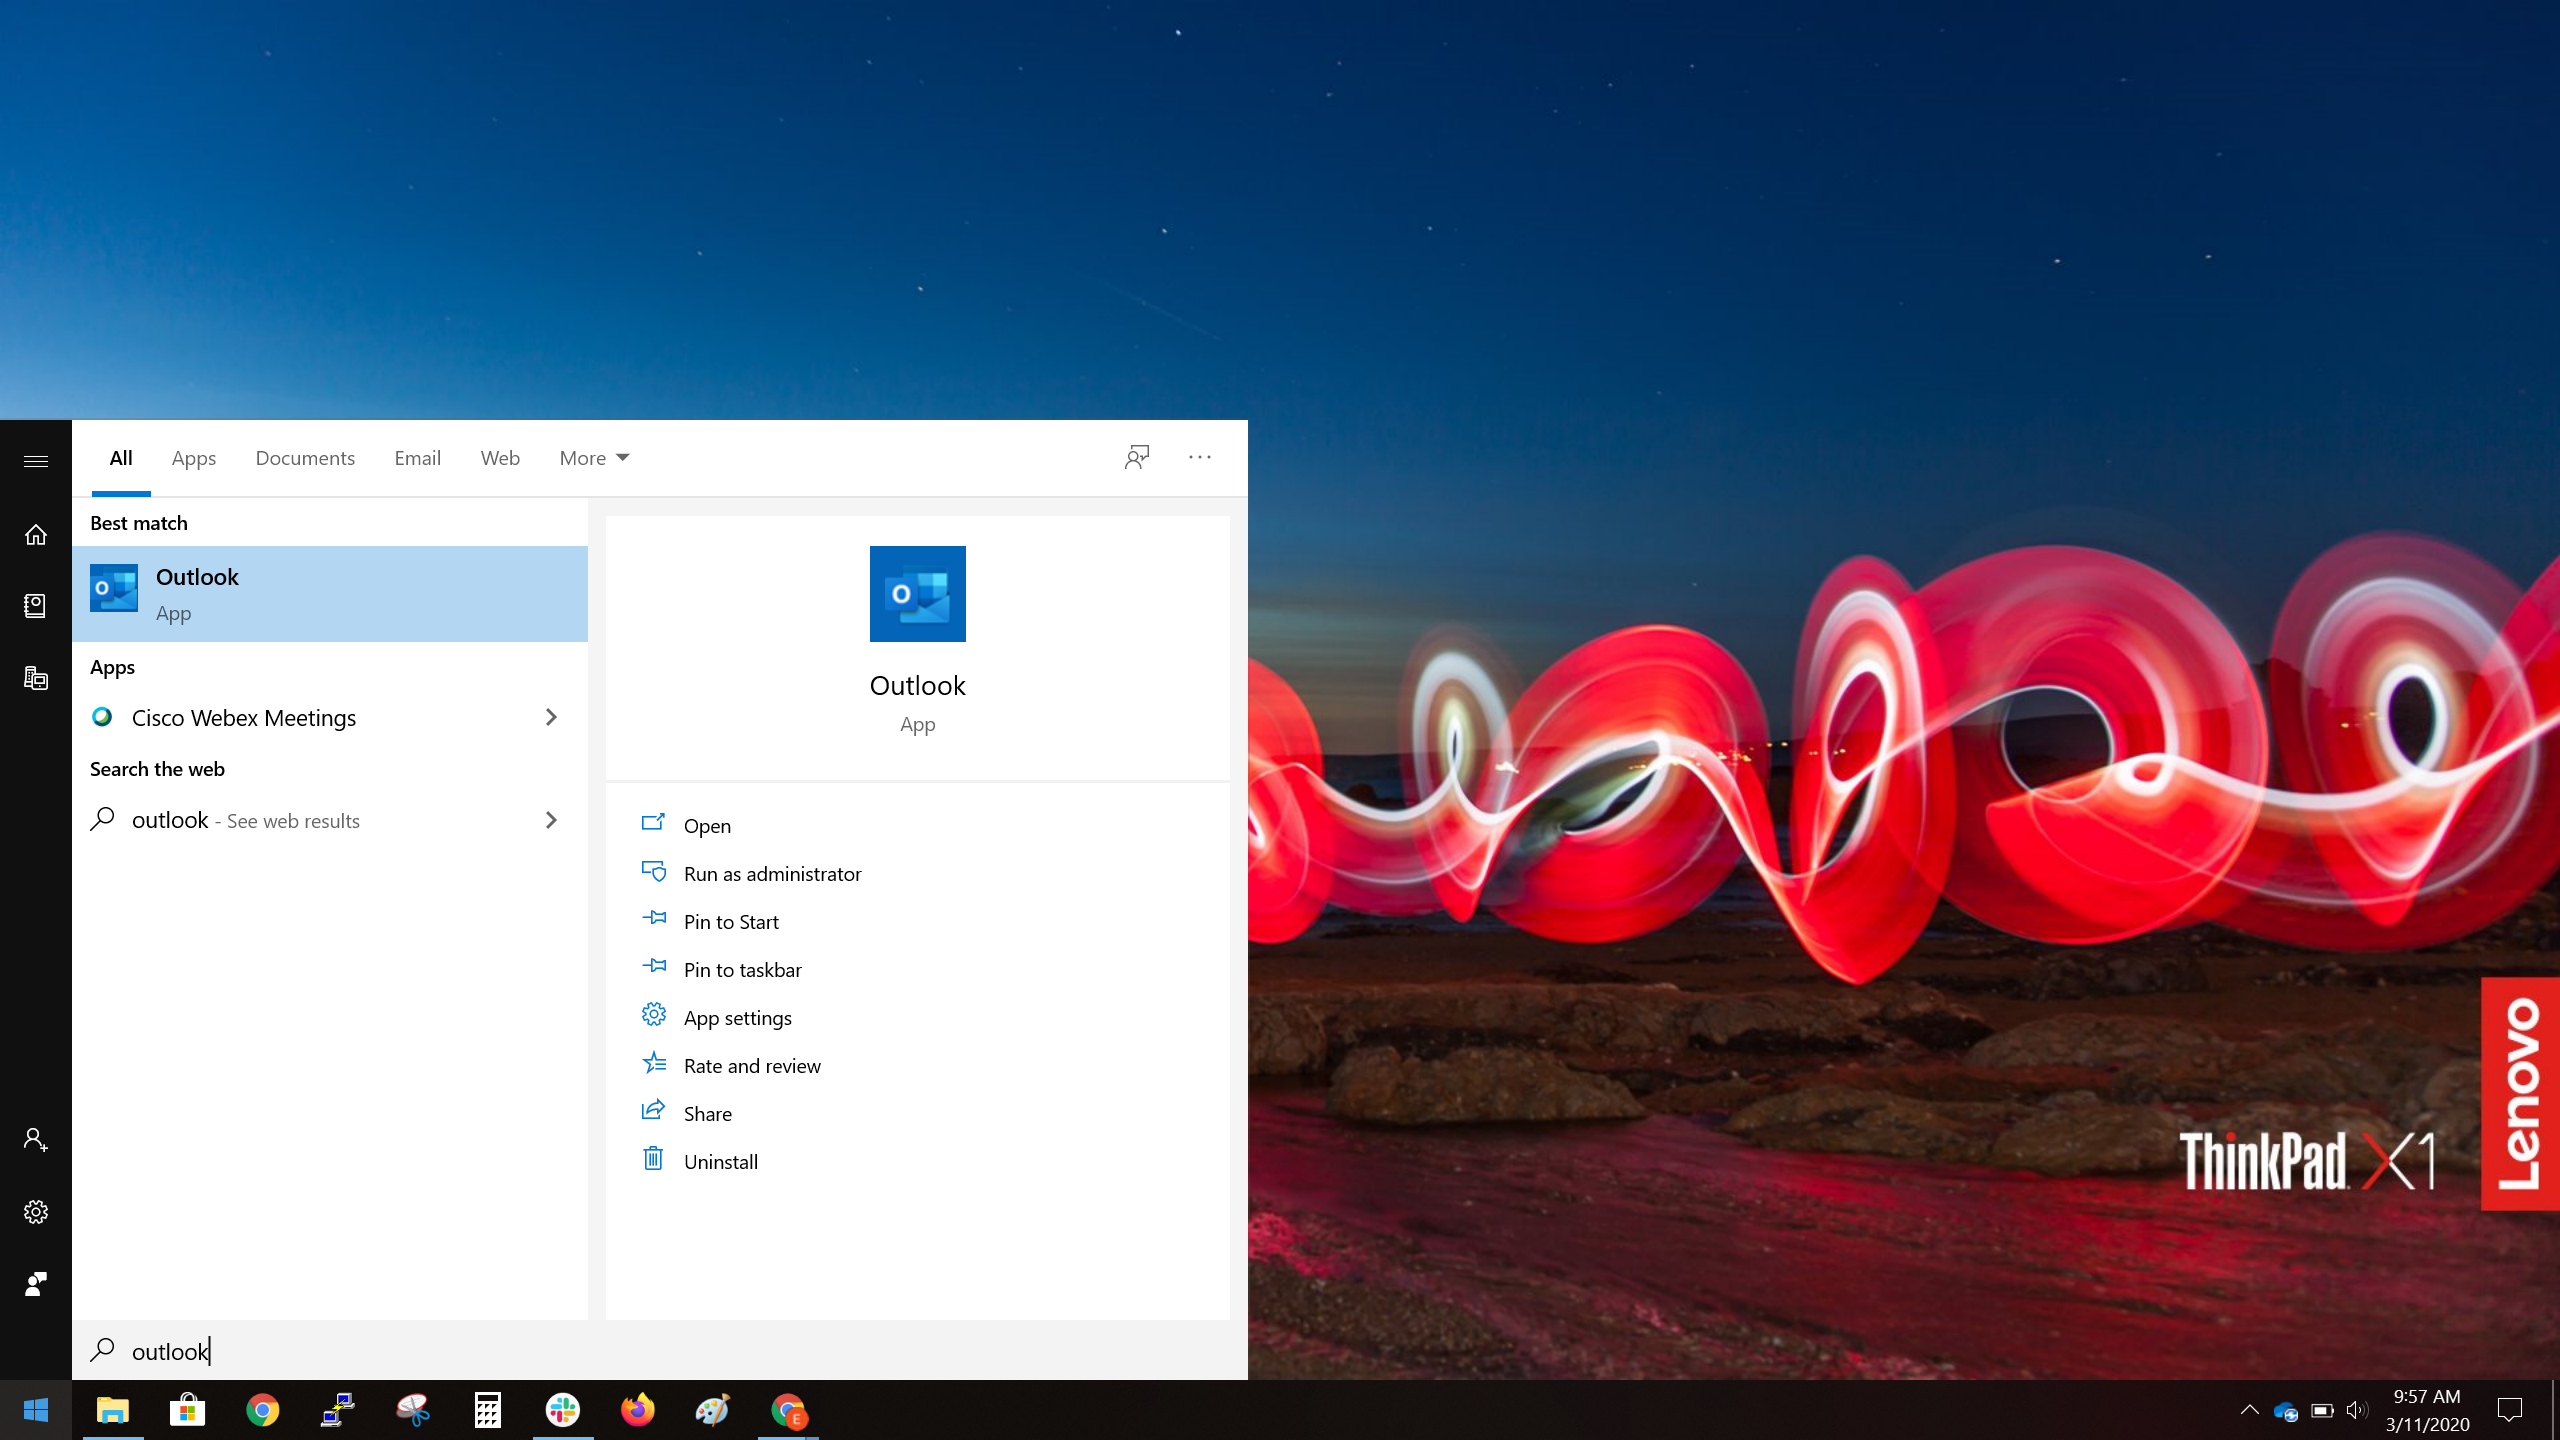
Go to the bottom left corner and Click/Tap on the Windows icon.

Scroll thru your programs to find Outlook or type in “Outlook” and you will find this icon. Click/Tap on the Outlook App.
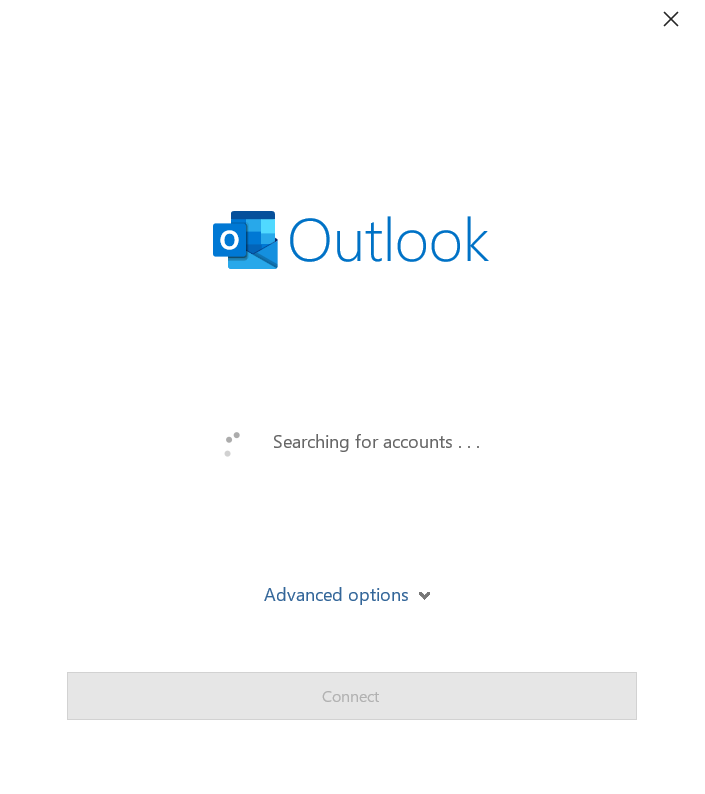
Outlook will search for accounts associated with your computer. Allow Outlook to scan for accounts.
Once done searching, you may see your Amplex email listed. If not, you will have to Click/Tap on Advanced options and Click/Tap on the box for “Let me set up my account manually” Click/Tap on Connect.

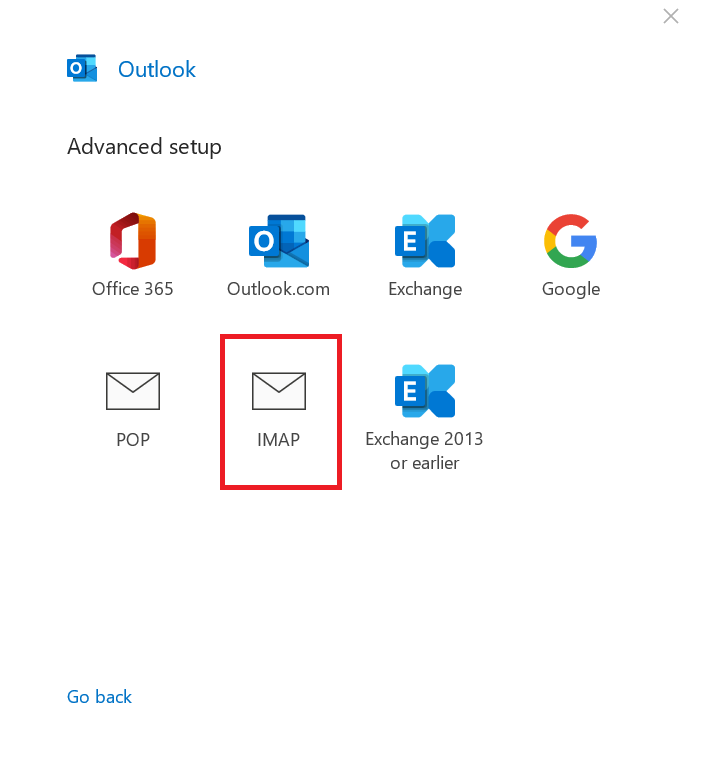
We want to select the IMAP settings from the Advanced setup screen. Click/Tap on the IMAP to continue.
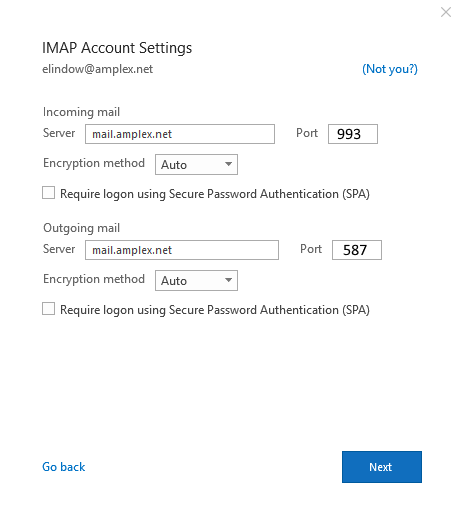
We will need to manually add in the server settings for incoming mail and outgoing mail. Click/Tap inside of the box next to server and add “mail.amplex.net” in both boxes, as shown. Encryption method for both incoming and outgoing will need to be set to “Auto” Click/Tap Next when done.
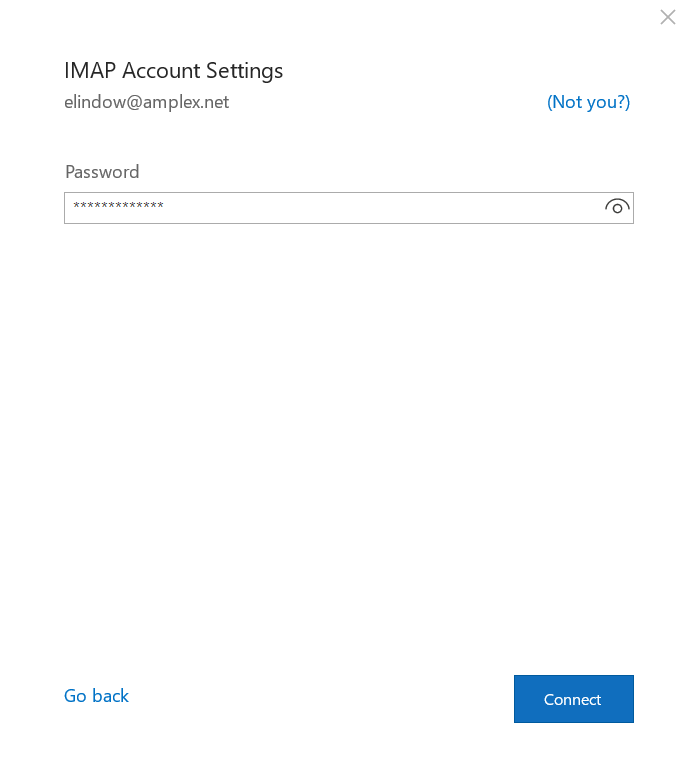
You will then be prompted to enter your password. Click/Tap in the box and enter your password. Click/Tap Connect to proceed.
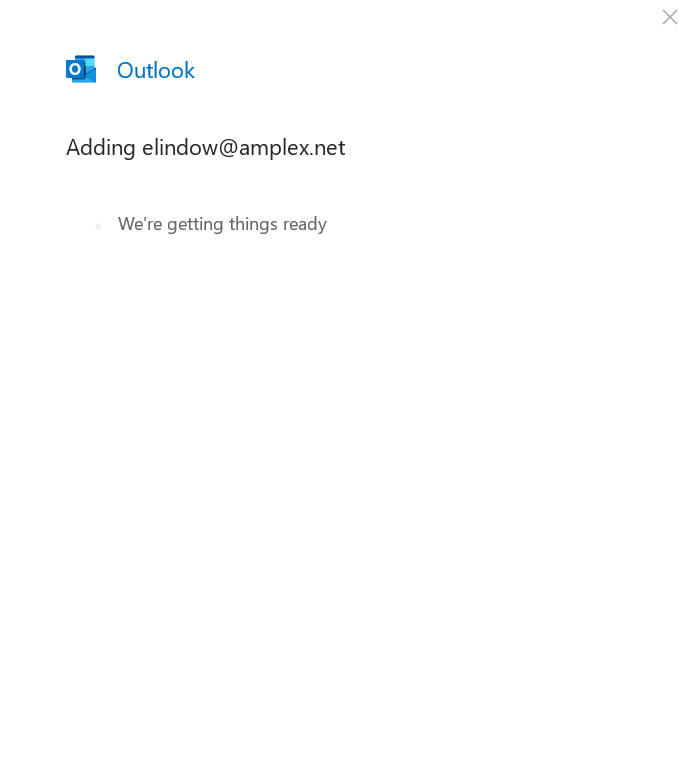
You will see the loading screen while it verifies the information for the server settings and password. If this fails, please double check the previous settings or password.
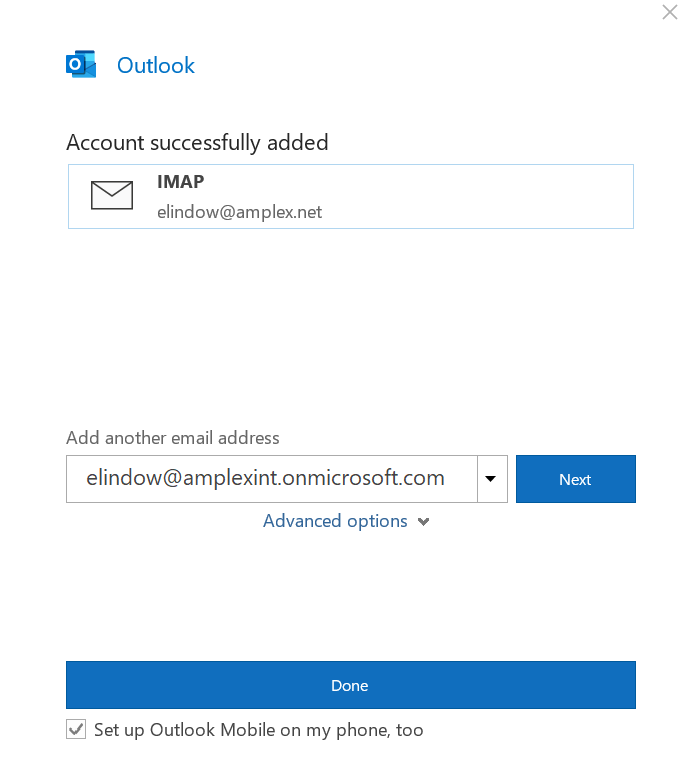
If everything is entered correctly, you will see the following message. Success! You are able to access your Amplex email thru Outlook via Office 365. Click/Tap Done when finished or you can add additional accounts.
Please Note: If you have a lot of e-mails it may take some additional time to download them before you are able to send a message. If you have any questions, please contact the office at 419-837-5015.


