|
Amplex Support https://support.amplex.net/knowledge-base/how-to-setup-e-mail-filters/ Export date: Thu Jun 4 4:04:47 2026 / +0000 GMT |
How To Setup E-mail FiltersE-mail filters allow you to setup rules which will flag, move or delete messages automatically. Many e-mail clients offer the ability to create e-mail filters which apply only to messages you open or view in that program. Amplex offers though our webmail interface server side filters which will take effect on our servers so every e-mail program or device will benefit from them. To use Amplex server side filters you will want to first enable the filtering option in Amplex Webmail then create a new filter to act on messages you receive. How To Enable Server Side Filters To begin log on to the Amplex Webmail site at https://webmail.amplex.net. Your username is usually the first part of your e-mail address before the @ symbol. Type in your e-mail password in the Password box and click Login. In the example below my e-mail username is timtest because my example e-mail address is [email protected]. 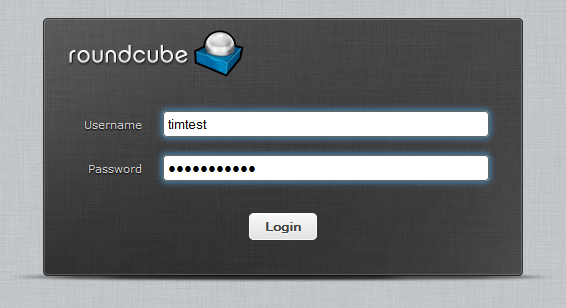 Once you have logged in click Settings in the upper right hand corner of the screen.  In the settings screen click Filters on the left Column then Click Roundcube. Click on the gear icon on the bottom of Filter Set column and click Enable/Disable until the Roundcube turns bold black. If it was already enabled you will see the text Roundcube turn gray. Simple click Enable/Disable again to re-enable it. 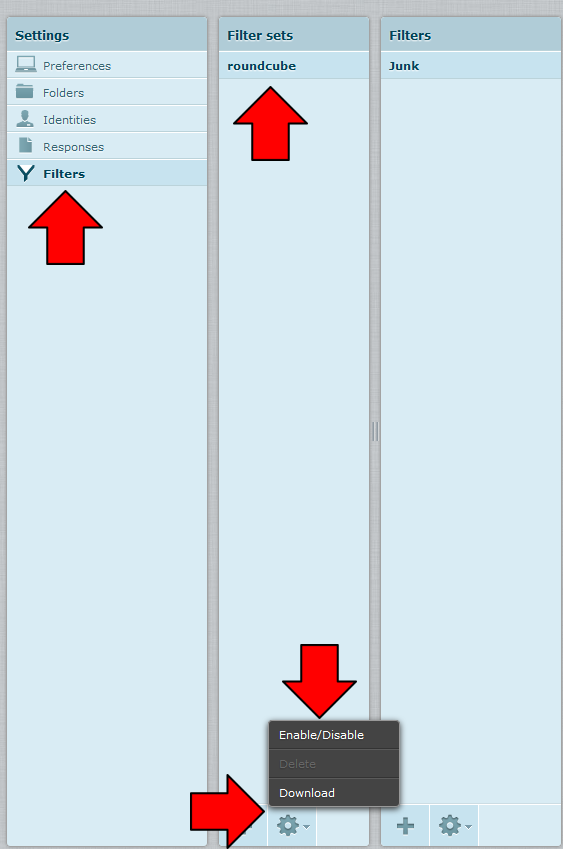 Now that filters have been enabled you can create your first filter. There are two ways to do this: by selecting an existing message 1 in your inbox you want to base the filter on or by creating a new filter from scratch 2 by filling in a form. Creating A New Filter Using An Existing E-mail Message Make sure you have enabled filtering using the instructions above before continuing. Begin by logging on to the Amplex Webmail site at https://webmail.amplex.net. Your username is usually the first part of your e-mail address before the @ symbol. Type in your e-mail password in the Password box and click Login. In the example below my e-mail username is timtest because my example e-mail address is [email protected]. Click on an e-mail you would like to use as a template for the new e-mail filter then click the More option on the top bar and click Create Filter. 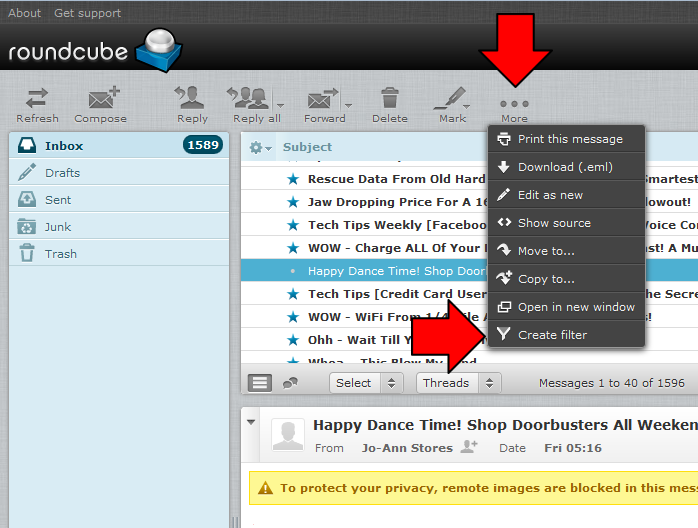 You will now be prompted to choose which areas of the message you would like the filter to apply to. The options are as follows: Subject: Filter messages with the same subject line. From: Filter messages from the same person. To: Filter messages sent to the same person (this is almost always your e-mail address) Click Next Step once you've selected which fields to filter the message based on. In the example below I've selected to filter messages from this person. 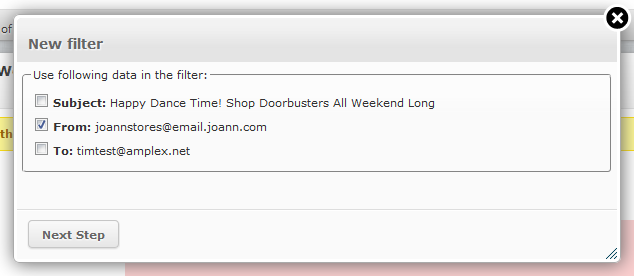 In the center of the screen you will see a new form which with options to fill in. Next to Filter Name type a unique name for your filter. Use a name which describes what the filter does to make it easier to identify. In the ...execute the following actions: box select what you would like to happen if this filter matches the rule. You can choose options like moving a message to a specific folder, deleting a message, redirect a message or send a notification e-mail to another address. In the sample below I've named my filter JoAnnToAds and chosen to automatically move those messages to my Ads folder. 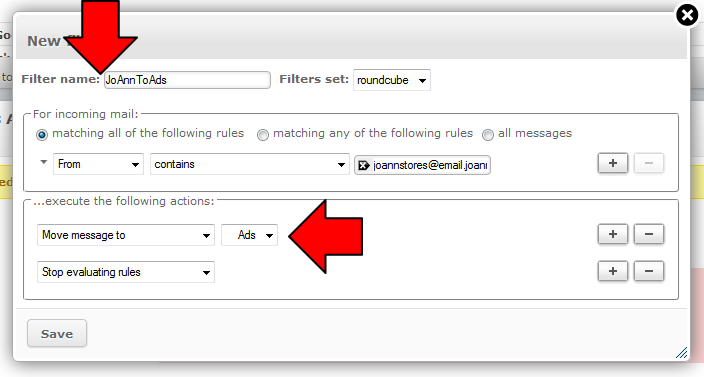 Click Save to save the filter. Creating A New Filter From Scratch Make sure you have enabled filtering using the instructions above before continuing. Begin by logging on to the Amplex Webmail site at https://webmail.amplex.net. Your username is usually the first part of your e-mail address before the @ symbol. Type in your e-mail password in the Password box and click Login. In the example below my e-mail username is timtest because my example e-mail address is [email protected]. Once you have logged in click Settings in the upper right hand corner of the screen. In the settings screen click Filters then in the last column click the + symbol to add a new filter.  On the right hand side of the screen you will see a new form which with options to fill in. Next to Filter Name type a unique name for your filter. Use a name which describes what the filter does to make it easier to identify. In the box labeled For Incoming Mail you can choose how the filter will identify the message to act on. You can choose many different options but the most common ones to use are: Subject: This will let you filter a messaged based on a specific word or words or phrases in a subject line. From: This will let you filter a messaged based on who the senders e-mail address. Body: This will let you filter a message based on a specific word or words in the body of the message. The box to the right offers many options for the logic of the matching but the most common to use is the contains option as this says if the area you chose contained what you type in the next box then apply this filter. In the final box to the right type what word or words to match based on. In the ...execute the following actions: box select what you would like to happen if this filter matches the rule. You can choose options like moving a message to a specific folder, deleting a message, redirect a message or send a notification e-mail to another address. In the sample below I've named my filter JohnDoeJunk and chosen to filter e-mails from [email protected] and automatically move those messages to my junk folder.  Click the Save Button on the bottom of the screen and your filter will now be enabled. FAQ: Question: Will these filters apply to all of my devices or just to the webmail site? Answer: Since these filters are run on the Amplex e-mail servers they apply to all of your devices automatically. |
Links:
|
|
Post date: 2015-10-13 09:34:45 Post date GMT: 2015-10-13 14:34:45 Post modified date: 2016-11-28 09:45:34 Post modified date GMT: 2016-11-28 14:45:34 |