|
Amplex Support https://support.amplex.net/knowledge-base/cpanel-how-to-view-your-site-before-dns-hosting-is-converted/ Export date: Thu Jun 4 3:06:51 2026 / +0000 GMT |
cPanel: How To View Your Site Before DNS / Hosting Is ConvertedThe instructions below are for customers who currently host a website with another provider and are converting to Amplex hosting. Since your existing site is hosted at another provider until the conversion is complete it is necessary to tell your computer which web hosting server to go to when visiting the site. By default when someone types your companies domain name in they will be directed to your current hosting provider. You can use the below instructions to redirect your PC to the Amplex web server to allow you to preview the new Amplex hosted site. WindowsIt's important to note that no matter which version of Windows you're working with you'll need to have administrator access to the machine to change the file Windows 7 & Windows VistaOn Windows systems the hosts file is located in c:windowssystem32driversetchosts Begin by opening Notepad as an Administrator by searching for notepad then right clicking on Notepad and choosing “Open as Administrator” 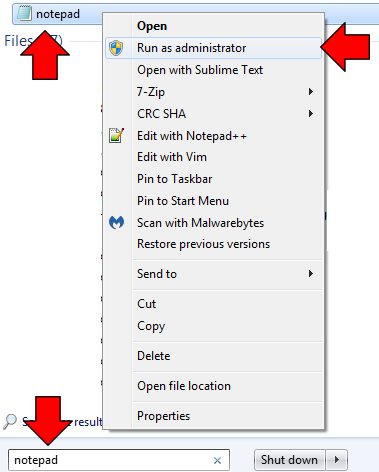 In Notepad Choose File then Open and in the File name box type: c:windowssystem32driversetchosts Click Open 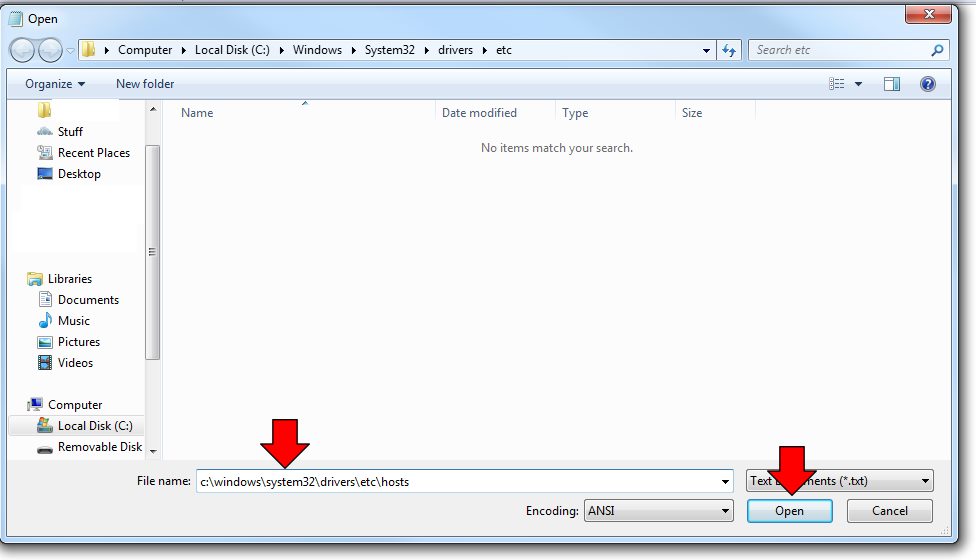 At that point you can add this line of text to the bottom of the file: 64.246.100.125 the-customer-domain.com 64.246.100.125 www.the-customer-domain.com Click Save then restart the computer and the Amplex hosted site will appear when visiting the-customer-domain.com Windows 8, 8.1, and 10In Windows 8 and 10 you'll need to open the Notepad app as an administrator. You can do this by searching for the application, right clicking, and choosing the “Run as Administrator” option. Once Notepad is running click File, Open, and then enter the following line into the “File name” box: c:windowssystem32driversetchosts Now you can edit the file normally and add this line of text to the end of the file: 64.246.100.125 the-customer-domain.com 64.246.100.125 www.the-customer-domain.com Just save the file, restart your favorite browser, and now you're ready to view the site on the new IP address. Mac OSThe easiest way to perform this work in the Mac OS is to access the file using terminal. You'll want to run this command to open your hosts file. In our example we're using the Vim text editor, but feel free to use any editor you like. sudo vim /etc/hosts This will open up the hosts file on your system Scroll to the bottom of the file and type A to append, press enter then past in the following (modifying these for customer's specific domain name) 64.246.100.125 the-customer-domain.com 64.246.100.125 www.the-customer-domain.com Exit vim by pressing escape then :wq |
|
Post date: 2018-09-04 11:38:27 Post date GMT: 2018-09-04 16:38:27 Post modified date: 2018-09-04 11:44:31 Post modified date GMT: 2018-09-04 16:44:31 |